You’ve landed on your wallpaper. Maybe it’s a botanical mural for the dining room, maybe it’s a moody grasscloth-textured print for the bedroom. Either way, you’re now staring at a pile of tools at the hardware store — or a page of options online — wondering which ones you actually need and which ones exist mainly to fill a starter kit nobody asked for. Wallpaper smoothing tools are the instruments you use to press wet, pasted paper flat against a wall without trapping air bubbles, tearing the surface, or stretching the pattern out of registration (that’s when the repeat — the repeated decorative motif that should match up at every seam — shifts because you pulled the paper unevenly). Get the kit right and installation feels methodical and satisfying. Get it wrong and you’re peeling and re-hanging at midnight, wondering where you went wrong.
This guide is for people who are past the “is wallpaper even a good idea?” stage. You have a wall in mind. You may have already ordered samples. Now you need to know exactly which tools belong in your cart — and which ones you can confidently leave on the shelf.
The Short List: What You Actually Need
Let’s anchor the decision before we go deep. According to The Spruce’s wallpaper hanging tools overview and reinforced by guidance from both Architectural Digest and Better Homes & Gardens, a complete functional smoothing kit for most DIY installs breaks down to five categories: a smoothing tool for broad passes, a seam roller for edges, a trim guide for cutting, a sponge for paste cleanup, and a level or plumb line for your first drop. Everything else — the seven-piece “pro kits” sold at big-box stores — is either redundant, situational, or actively risky on delicate hand-printed or embossed papers.
By the numbers:
- 5 core tools cover 95% of DIY installs
- 1 additional tool (a wide plastic smoother) is worth adding for non-woven wallpapers specifically
- 2–3 tools commonly sold in starter kits can damage high-end papers if used incorrectly
- Average cost to assemble a complete DIY tool kit: $30–$65, not including paste or primer
The goal of every smoothing pass is the same: move air and excess paste from the center of the panel toward the edges, without stretching the paper or leaving marks. Different tools do this differently, and the paper type you’re hanging determines which approach is safest.
Tool by Tool: What Each One Does and Whether You Need It
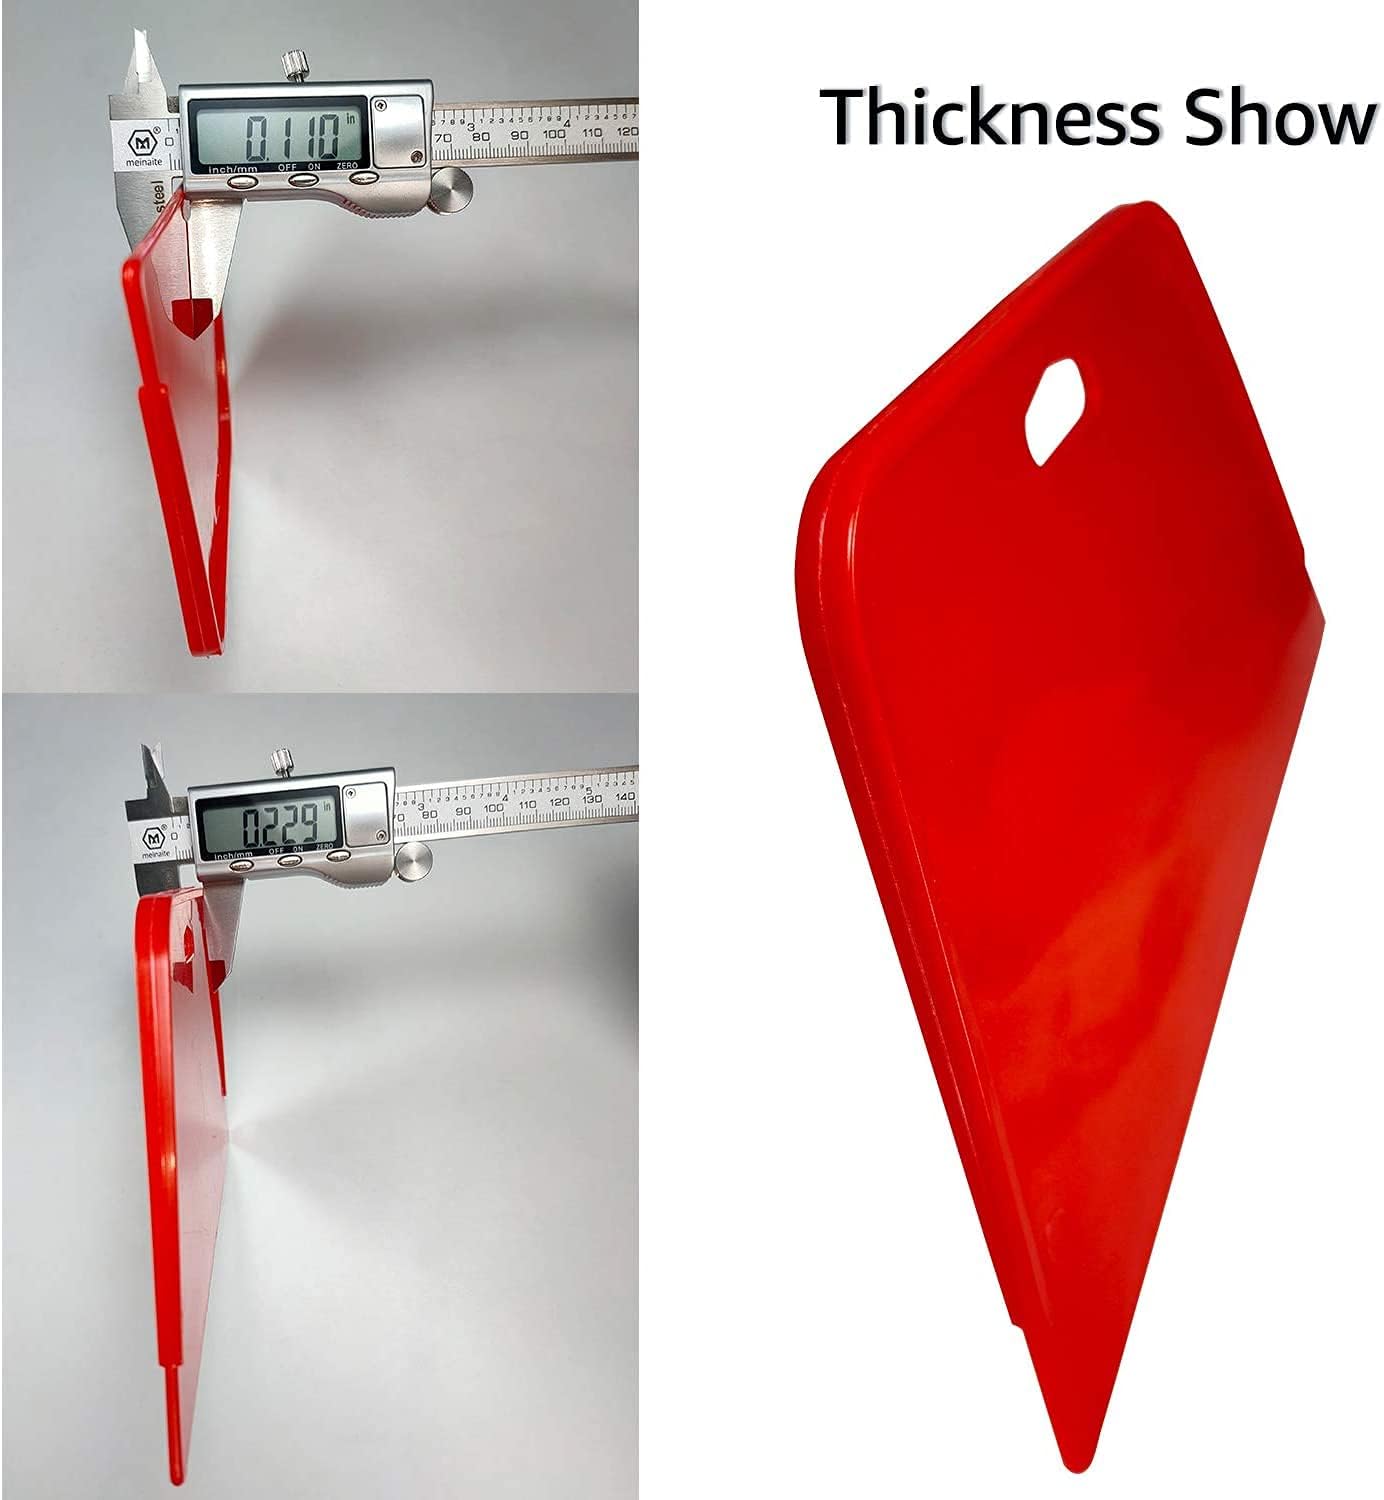
Wallpaper Smoother (Broad Plastic Squeegee Style)
This is the workhorse. A wallpaper smoother — sometimes called a wallpaper squeegee or broad smoother — is a flat, flexible plastic tool, typically 10–12 inches wide, that you drag from the center of a hung panel outward and downward in overlapping strokes. The goal is to push air pockets toward the edges before the paste begins to set.
This is a non-negotiable tool. Every source consulted — from the Apartment Therapy beginner’s guide to Architectural Digest’s pro installation breakdown — recommends it as the primary smoothing instrument. The flex in the plastic matters: a rigid tool will skip over slight wall imperfections and leave bubbles underneath; a tool with the right flex conforms to the wall without digging into the paper surface.
Amazon
$22.04
In stock on Amazon
Check price on AmazonOne important caveat: on hand-painted wallpapers, grasscloth, or papers with a raised or embossed texture, reviewers and professional installers consistently flag the hard plastic smoother as a risk. The pressure required to push out bubbles can crush the texture or leave drag marks that are permanent. For those papers, you substitute a soft-bristled smoothing brush instead (more on that below). On standard printed non-woven papers — the kind most mid-range DIYers are hanging — the plastic smoother is your main tool.
ROMAN’s
$5.28
In stock on Amazon
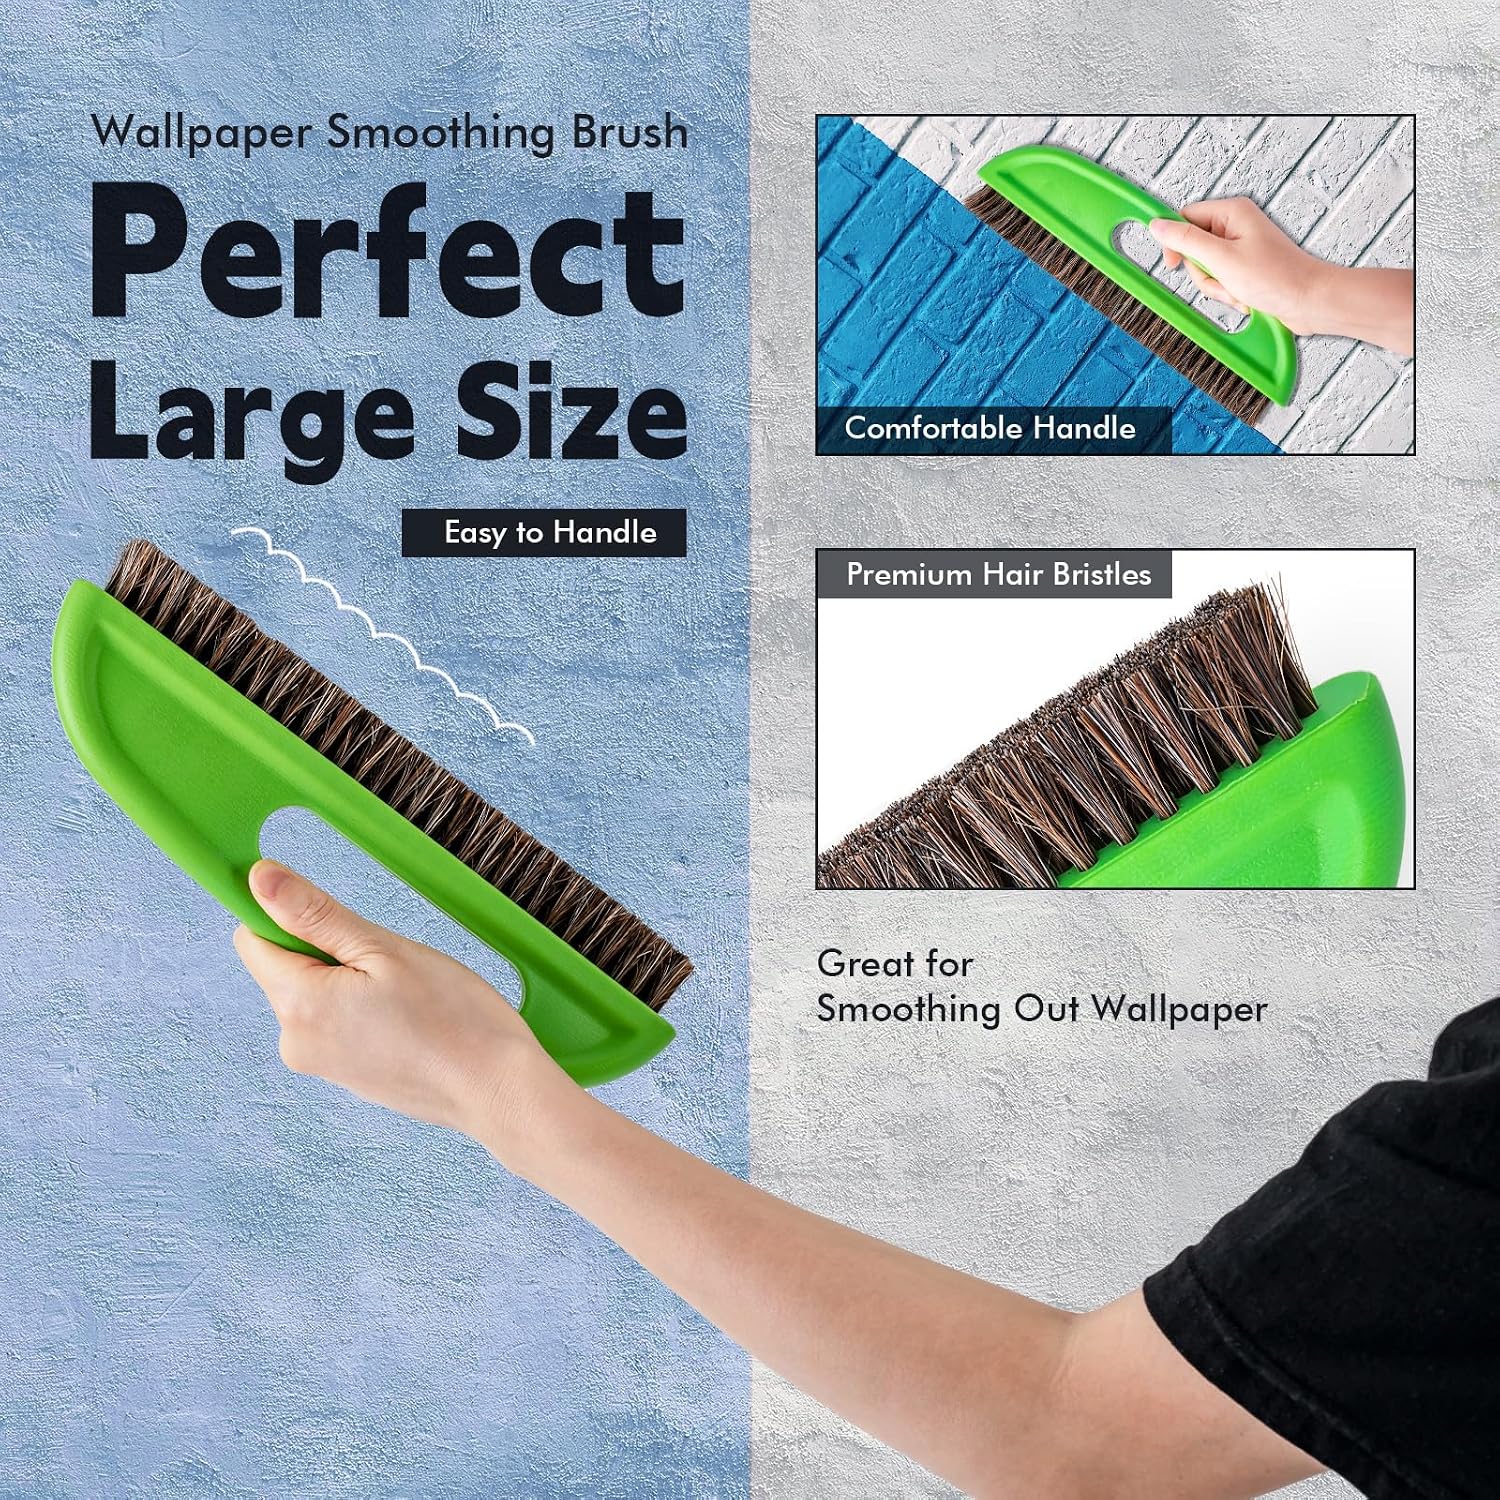
Check price on AmazonWallpaper Brush (Smoothing Brush)
A wallpaper smoothing brush looks something like a wide, flat paintbrush with soft, dense bristles. It performs the same center-to-edge smoothing motion as the plastic smoother but with significantly less pressure and no hard edge. This makes it the right choice for delicate substrates: hand-painted papers, silk-backed papers, grasscloth (a woven natural fiber wallcovering), and any embossed surface where you’d rather sacrifice a little bubble-chasing efficiency than risk a permanent surface mark.
Hunker’s installation tool guide specifically calls out the soft brush as the preferred tool for natural fiber wallcoverings. If you’re investing $300+ per panel in artist-designed or hand-painted wallpaper, this is not a place to economize. The brush costs $12–$20 and the paper costs a great deal more.
Art3d
$5.99
In stock on Amazon
Check price on AmazonIf you’re hanging standard printed wallpaper on a budget, you can skip the brush — the plastic smoother handles it. If you’re hanging anything with texture, weight, or a painted surface, the brush is mandatory. That’s the decision rule.
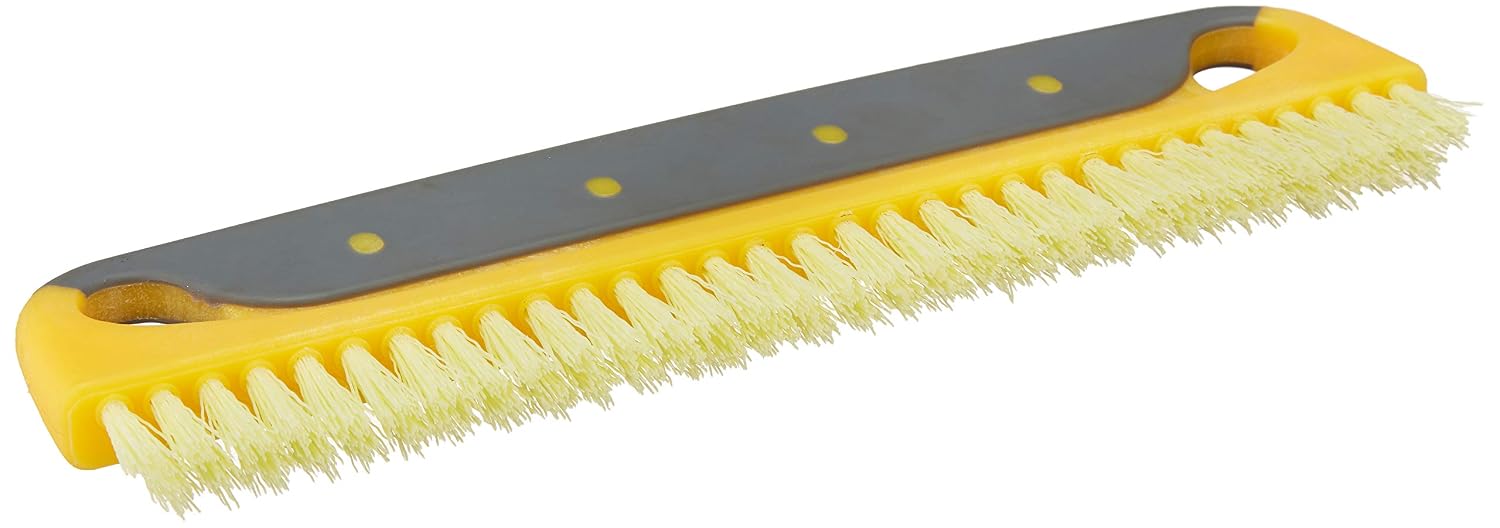
Seam Roller
A seam roller is a small, narrow rubber roller on a handle, specifically designed to press down the vertical edges (seams) where two panels meet. It’s about 1.5–2 inches wide and meant for targeted pressure, not broad smoothing.
This one earns its place in the kit. Seams are the most visible failure point in any wallpaper install — a seam that lifts after the paste dries will catch light and shadow in a way that’s immediately obvious. Better Homes & Gardens’ installation guide emphasizes rolling seams about 15–20 minutes after hanging, once the paste has partially set but before it’s fully cured, to get a clean, flat bond.
Amazon
$22.04
In stock on Amazon
Check price on AmazonImportant exception: do not use a seam roller on grasscloth, string wallcovering, or embossed papers. The roller will flatten and mark the texture at the seam, making the seam MORE visible, not less. For those materials, press seams gently with a damp sponge or your fingertips only.
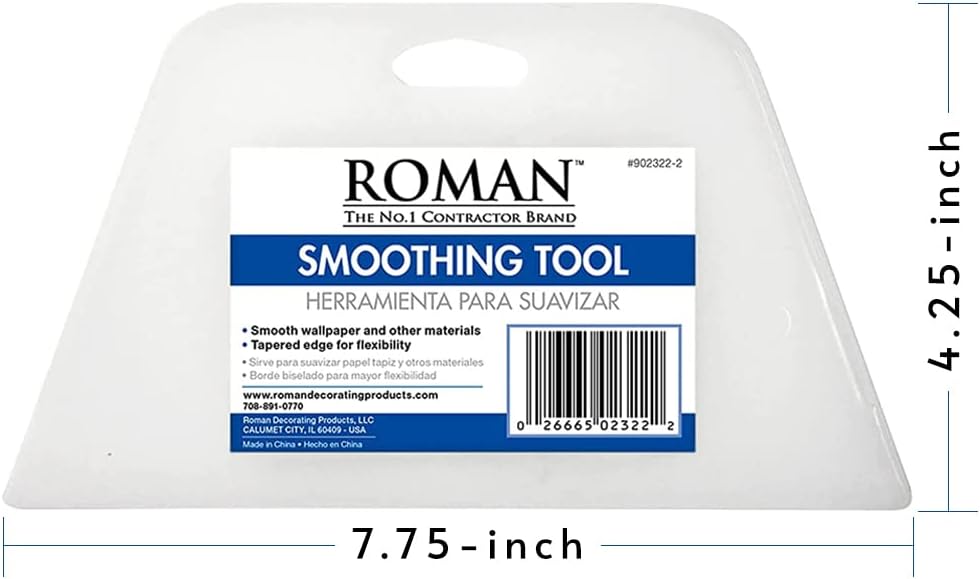
Trim Guide (Metal Straight Edge)
A trim guide — a long, rigid metal straight edge, typically 18–24 inches — is used alongside a utility knife to cut wallpaper flush at the ceiling line, baseboard, and around switch plates and outlets. It’s not a smoothing tool per se, but it belongs in every kit because precise trimming is inseparable from a clean finish.
Without a trim guide, you’re cutting freehand against the wall, and the knife will wander. The Spruce’s tool overview specifically recommends a metal (not plastic) straight edge because utility knife blades will notch a plastic guide over time, ruining the straight edge.
ROMAN’s
$5.28
In stock on Amazon
Check price on AmazonA good metal trim guide runs $8–$15. Skip it and you’ll feel the absence on every ceiling cut.
Sponge and Bucket
A large natural or synthetic cellulose sponge is used to wipe paste residue off the surface of the paper as you work. Paste left on the front of the paper will dry to a stiff, slightly shiny film that’s visible in raking light (light hitting the wall from a sharp angle, which reveals surface irregularities). It also attracts dust.
The sponge isn’t glamorous, but it’s necessary. Use two buckets: one with clean water for the sponge, one (if you’re mixing paste from powder) for paste. Apartment Therapy’s hanging guide emphasizes keeping the front-of-paper wipe-down as part of the rhythm of every panel — hang, smooth, trim, wipe — rather than saving it for the end of the room.
FOSHIO
$20.99
In stock on Amazon
Check price on AmazonLevel and Plumb Line
Not a smoothing tool, but the most important tool in the entire kit. A plumb line (a string with a weighted bob at the end that hangs perfectly vertical due to gravity) or a long bubble level establishes your first true vertical line on the wall. Every subsequent panel is hung edge-to-edge against the previous one, so if your first drop is off by even a quarter inch, the error compounds across the wall.
Architectural Digest’s installation guide treats the plumb line as step one of any install — non-negotiable regardless of experience level. A standard 4-foot level works, but a laser level is worth considering if you’re doing multiple rooms; reviewers consistently report that the time saved on a laser level pays for itself in a single large room install.
Amazon
$22.04
In stock on Amazon
Check price on AmazonThe Tools You Don’t Need (and Why They’re in Every Kit Anyway)
The rubber brayer: A hard rubber brayer roller (the kind used in printmaking) occasionally shows up in wallpaper kits. It applies way too much localized pressure for most wallpapers and will mark or emboss the surface. Skip it.
The plastic seam roller with a patterned surface: Some kits include a seam roller with a textured or ridged surface meant to “grip” the seam. Reviewers report that these leave visible roller marks on any paper with a semi-gloss surface coating. Use a smooth rubber seam roller only.
The plastic squeegee with a handle (window-washer style): These are sold in some multi-tool kits as a wallpaper smoother. The geometry is wrong — they’re designed for rigid glass, not a flexible paper surface. The flat plastic smoother or brush does the job better for every paper type.
The 10-piece “pro starter kit” box sets: These bundled kits — sold at both Home Depot and Wayfair — typically include three or four of the tools above plus several redundant items that inflate the count. The Spruce’s overview notes that experienced installers almost universally arrive at a smaller, more specific kit over time. Buying the kit isn’t wrong, but go in knowing which tools you’ll actually use and which will stay in the box.
Decision Framework: Match Your Tools to Your Paper
If you’re deciding right now what to order, this is the rule:
Standard non-woven printed wallpaper (most mid-range brands, most peel-and-stick murals that use non-woven backing): plastic broad smoother Art3d — $5.99, seam roller, metal trim guide, sponge, level. That’s your complete kit.
Hand-painted, grasscloth, embossed, or delicate textured paper: swap the plastic smoother for a soft wallpaper brush Amazon — $22.04, skip the seam roller (use damp fingertip pressure at seams), add the trim guide, sponge, and level. The brush is doing more protective work here than the smoother; don’t compromise on bristle softness.
Large mural installs (panels wider than 24 inches): add a second set of hands before you add any tools. A wide panel is unwieldy alone, and the cost of a misaligned pattern repeat on a $400 mural panel far exceeds the cost of asking a friend to hold the top edge. Beyond that, the same kit applies.
The honest summary: you need five tools, they cost under $65 combined, and three of them cost less than $15 each. The rest is marketing. Spend what you’re saving on a good primer — because no smoothing tool in the world saves a panel hung on an unprimed wall.
Sources consulted: Architectural Digest, “How to Hang Wallpaper Like a Pro”; The Spruce, “Wallpaper Hanging Tools and Supplies”; Apartment Therapy, “The Beginner’s Guide to Hanging Wallpaper”; Better Homes & Gardens, “How to Hang Wallpaper”; Hunker, “Wallpaper Installation Tools.”